Photobooks are more than just collections of images—they’re tangible stories that capture memories, emotions, and experiences. Whether you’re preserving a family vacation, chronicling a wedding, or compiling your best photography work, creating a photobook that tells a story is an art form in itself. In this guide, we’ll dive deep into how to make a photobook, offer creative photobook ideas, and explain how to craft a storytelling photo album that leaves a lasting impression.
Why Storytelling Matters in Photobooks
A photobook is only as compelling as the story it tells. When you curate photos with a narrative in mind, your album transforms from a random assortment of images into a cohesive journey that engages viewers emotionally. Storytelling in photobooks:
Preserves memories with context.
Enhances emotional impact, helping viewers feel the moment rather than just see it.
Guides the viewer through the journey, making it more engaging.
Creates a keepsake that can be passed down generations.
Think of it as writing a book, but using images instead of words. The sequence of images, their layout, and even captions can build tension, highlight milestones, or evoke nostalgia.
Step 1: Define Your Story
Before you start choosing photos, you need to decide what story you want to tell. Ask yourself:
What is the purpose of this photobook? (Vacation, family memories, portfolio, life milestones)
Who is your audience? (Personal use, gift, professional showcase)
What’s the timeline or narrative arc? (Chronological, thematic, or conceptual)
For example, if you’re creating a photobook for a wedding, your story might follow:
The morning preparations
The ceremony
The reception
Intimate candid moments
Alternatively, for a travel photobook, you could structure it geographically, day by day, or by themes such as “adventures,” “food experiences,” and “people I met.”
By defining the story first, you’ll make the next steps of photo selection and layout much easier.
Step 2: Gather and Select Your Photos
Once you know your story, it’s time to collect your images.
Collect all potential photos – Pull from cameras, phones, social media, or cloud storage.
Cull ruthlessly – Only include images that contribute to the story. Avoid duplicates or photos that don’t enhance the narrative.
Prioritize quality – High-resolution images make your photobook look professional and polished.
Balance variety – Include wide shots, close-ups, candid moments, and detail shots to create visual interest.
A tip for storytelling photobooks: Choose photos that create a natural flow. For example, a series of photos showing a child opening a gift works better if you include the moments leading up to and following the event.
Step 3: Choose a Layout and Style
The layout is critical in a photobook because it sets the pacing and tone of your story. Popular layout options include:
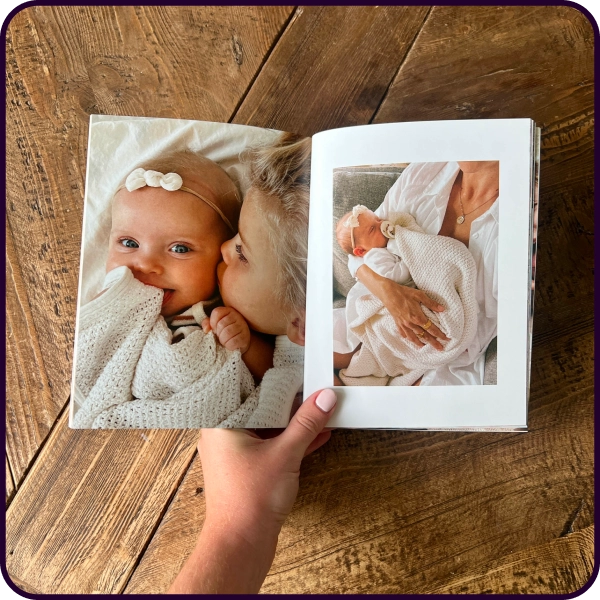
Chronological layout – Tells your story in the order events occurred. Perfect for vacations, weddings, or baby albums.
Thematic layout – Groups images by themes, like “family,” “adventure,” or “milestones.”
Grid layout – Creates a modern, clean aesthetic with multiple photos per page.
Full-page spreads – Makes a single image the focal point, ideal for dramatic landscapes or portrait shots.
Consider your photobook’s design style:
Minimalist – Clean backgrounds, simple fonts, and plenty of white space.
Scrapbook style – Playful, with patterns, stickers, and handwritten captions.
Magazine style – Polished and editorial, perfect for professional portfolios.
Consistency is key. Stick to one or two fonts, a harmonious color palette, and uniform margins to make your photobook feel cohesive.
Step 4: Arrange Photos to Create a Narrative Flow
Storytelling in a photobook isn’t just about which photos you include—it’s about how you arrange them. Here’s how to structure your album:
Start strong – Your first page should grab attention. Choose a photo that sets the scene.
Build the middle – Use this section to develop your story. Include sequences that show progression or emotion.
End memorably – Finish with an impactful image that leaves a lasting impression.
Think of your photobook like a film: the opening establishes context, the middle develops depth, and the ending resolves the story.
Step 5: Add Captions and Text
Captions add context and deepen storytelling. They don’t need to be long—sometimes a single word is enough. Consider:
Names, dates, and locations
Funny or sentimental anecdotes
Quotes or song lyrics that complement the image
Thoughtful reflections
Avoid overloading pages with text. Your images should remain the focus, with captions enhancing rather than distracting.
Step 6: Include Design Elements
Design elements can elevate your photobook from basic to captivating. Options include:
Borders and frames – Highlight key images or create a sense of cohesion.
Backgrounds – Subtle textures or colors can set the mood.
Icons and stickers – Ideal for a scrapbook-style album.
Page numbers or date stamps – Useful for chronological albums.
Experiment with these elements, but always keep your story in mind. Every design choice should serve the narrative, not overshadow it.
Step 7: Choose the Right Photobook Format
Photobooks come in various formats. Choosing the right one depends on your story and budget:
Softcover vs. hardcover – Hardcovers are durable and give a premium feel; softcovers are lighter and more affordable.
Size – Larger books are ideal for showcasing photography, while smaller ones are great for personal keepsakes.
Paper quality – Glossy paper enhances color photos; matte paper reduces glare and feels sophisticated.
Binding – Lay-flat bindings allow full-page spreads without interruption.
Remember, your photobook should feel as polished as the story it tells.
Step 8: Print and Review
Before ordering, preview your photobook digitally to catch errors in layout, spelling, or photo placement. Consider:
Checking for photo resolution issues
Ensuring captions are correctly placed and spelled
Confirming chronological or thematic flow
Some platforms offer sample pages or proofs. Reviewing these before final printing helps you avoid mistakes and ensures a professional result.
Step 9: Share and Preserve Your Story
Once printed, your photobook is ready to be shared. Tips for sharing:
Gift it – Photobooks make meaningful presents for friends, family, or clients.
Display it – Keep it on a coffee table for easy access and conversation.
Digitize it – Share a digital version with loved ones or post it online.
A well-crafted photobook becomes more than a memory collection—it’s a story that can be revisited for years to come.
Photobook Ideas for Storytelling
To inspire your own project, here are some photobook ideas that go beyond the ordinary:
Travel Diaries – Capture your journey with day-by-day highlights, maps, and travel tips.
Family History – Combine old family photos with modern ones to create a generational story.
Pet Adventures – Chronicle your pet’s milestones, from adoption to daily antics.
Wedding Memories – Capture candid moments, ceremonies, and celebrations with a narrative flow.
Creative Portfolio – Showcase your photography, illustration, or design work with context and commentary.
Personal Growth Journey – Use before-and-after photos, journaling excerpts, or milestones to tell a story of transformation.
The key is to choose a theme that naturally lends itself to storytelling and then structure your photobook around it.